Posts

Showing posts with the label recycle

Upcycled Pendant from Old Nine West Shoe Jewellery
Image
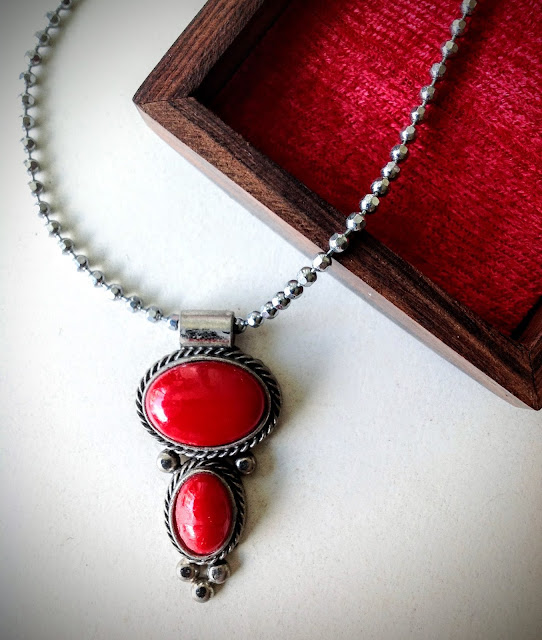
Dear readers, this blog will no longer be updated.  All contents will be moved to: upcycleliving.blogspot.com Please update your link, and we hope to see you again soon 😊 Took less than 5 minutes, this is probably the fastest project to date. No one would've guessed its past life if I don't tell. This was the pair of Nine West shoes I bought at a really great promotion price. Loved them, worn them to death - literally.  But I'm not quite ready to part with them completely yet, and the decorative jewels still look good. So before I binned the shoes, I removed the shoe jewellery from both shoes and turned them into pendants. Yes I now have 2 Nine West - so to say - pendants, and why not?

Upcycled Padded iPad Case from an Old Cancer Research Canvas Bag

Image
Dear readers, this blog will no longer be updated.  All contents will be moved to: upcycleliving.blogspot.com Please update your link, and we hope to see you again soon  😊 Since making the  Passport Boarding Pass Holder  from the old Cancer Research bag, my sore fingers have had some good rest so it's time to do something with the remaining material. Using the same method as the  Passport Boarding Pass Holder , I made an iPad case: I've used an old worn out vest (the size was just nice) as the lining,  so that the case will have some kind of padding as extra protection for the iPad. Securing the padding (old vest) with rough running stitch on both ends.   After doing proper back stitching on both ends, fold into half and stitch on both sides. Turn inside out. Unused hair rubber bands stitched under buttons to make loops, then stitch 2 buttons on the other side. In our memory, but now serving even better purp...

Upcycled Passport Boarding Pass Holder from Old Cancer Research Canvas Bag

Image
Dear readers, this blog will no longer be updated.  All contents will be moved to: upcycleliving.blogspot.com Please update your link, and we hope to see you again soon  😊 An up-cycled Cancer Research wallet that my passport and any boarding pass can fit nicely in, even great for certain shopping vouchers (God knows why they made them so long!) 😍 The Cancer Research canvas bag before the make over The process was pretty simple: 1. Measure and cut the canvas and a sheet of craft foam (as lining) to the desired size: 22cmx22cm (with excess of at least 2cm all round) 2. Fold into half and secure the foam with 2 ends wrapped over it, then sew both sides. 3. Turn it out, then secure the loops (which are unused hair rubber bands for when I had long hair) with (old) buttons on one side, 4. and stitch 2 more buttons on the other side. The rubber band can now be looped over and keep the content secure. Obviously, it won't keep coins, but that wasn't what I...

Instant Apron from Old Dress

Image
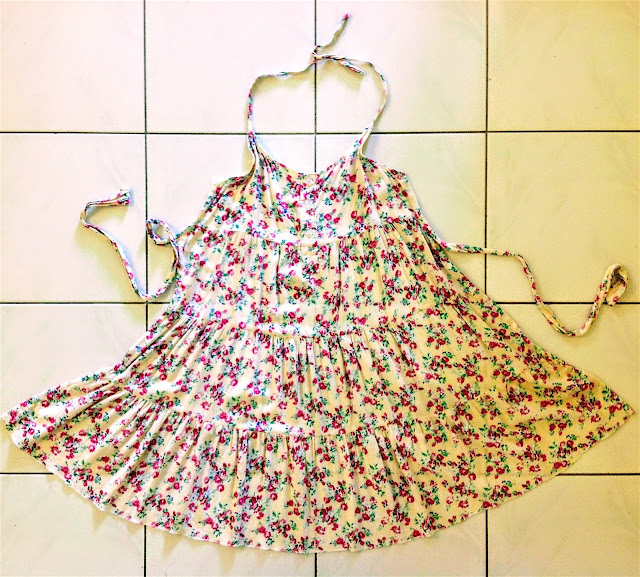
Dear readers, this blog will no longer be updated.  All contents will be moved to: upcycleliving.blogspot.com Please update your link, and we hope to see you again soon  😊 I love aprons: the design, the look, wearing it. But let's face it, aprons are not cheap. And to think that it's something that I wear to block off oil stains and dirt from cooking, it just doesn't make sense to spend money on it. Oh I'm such a stingy hag 😈 This was a sundress I had but worn off over time, and I'd ripped a whole somewhere on the back. Can't give it to charity, didn't want to cut it off into cleaning cloth (not yet), so I had to do something about it, and with it. Since my old apron has become so manky, it deserves a retirement. This old spaghetti strap dress came ready handy as it came ready with 2 attached belts for back tie bow, so all I needed to do was to separate the front and the back (keep the spaghetti straps and belt attache...

Drawstring Bag Knapsack for Exercises, Made from Old Jeans

Image
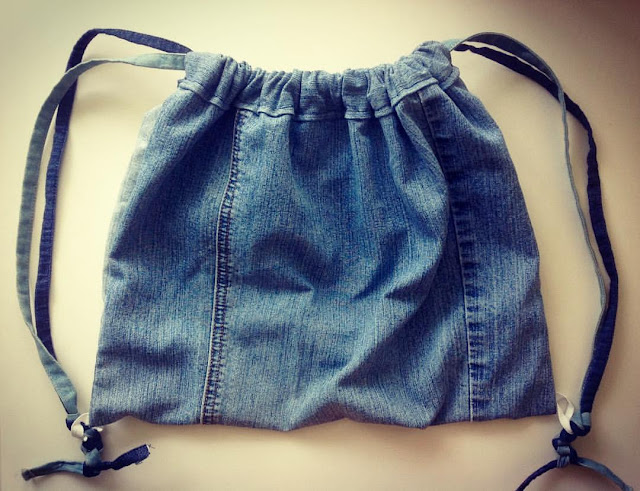
Dear readers, this blog will no longer be updated.  All contents will be moved to: upcycleliving.blogspot.com Please update your link, and we hope to see you again soon  😊 Body: one leg of old ripped jeans. Straps: unwanted belts that came with two different denim dresses. That's all folks, for I, is off for a walk. 🏃

DIY Tinsel Christmas Tree New Lift

Image
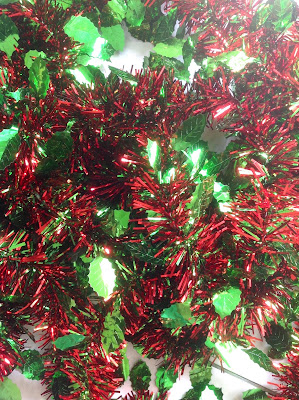
Dear readers, this blog will no longer be updated.  All contents will be moved to: upcycleliving.blogspot.com Please update your link, and we hope to see you again soon  😊 Connect all the tinsels together to make a really long one This time I first wrap up the tripod with some red net fabric we saved from a gift hamper. This way the tinsel holds better in place when twirled around the frame. And the angel lights are placed first so that the wire is not visible over the tree. Start the long tinsel on the top with a knot then twirl it around the tripod until it's all covered up. Tie the end to one of the tripod legs to secure it.

Upcycled Wine Cork Trivet

Image
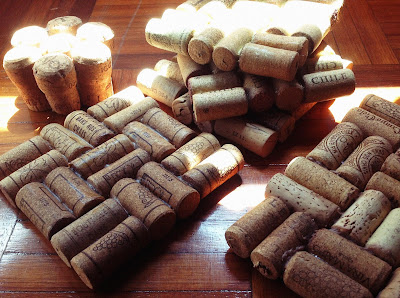
Dear readers, this blog will no longer be updated.  All contents will be moved to: upcycleliving.blogspot.com Please update your link, and we hope to see you again soon  😊 Until we started buying screw top wine, I had been painstakingly saving up all the wine corks: cleaning, drying and storing. Thanks to my inexplainable sentiment towards the little brown thing and the thought that one day I would be able to use them for something, I've filled up a whole large shoe box. And they had been in there for 7 long years! Just when I was about to give up and decide to clean them out, I caught a glimpse of a trivet made of wine corks in the background of a TV show. Obviously this is not an original idea and surely there must be others who've already done so, but hey I managed to use up all the corks and turned them into something useful - that's good enough for me. Most importantly: I get to keep them, not bin them ;)

What to do with damp stained shirt

Image
Dear readers, this blog will no longer be updated.  All contents will be moved to: upcycleliving.blogspot.com Please update your link, and we hope to see you again soon  😊 This cushion cover is made from one of my husband's old shirts, which unfortunately had been damp stained on the collar due to the highly humid weather. We can't give it away to the charity and the material is not suitable for cleaning. I was meant to upcycle it into a wrap dress but was too lazy to do so. Whilst I was staring into the buttons the idea just came to me. It was so simple: Just lay the shirt flat, buttoned, turned inside out. Mark out the square (whatever size fits your cushion) where the button panel will fall in the middle. Secure with pins or quick stitches, cut the excess material out and sew it all around. (I did it by hand as I don't have a sewing machine) Unbutton and turn inside out. Now you have a cushion cover with ready button fastening. We probably w...

Handmade Hand Fan

Image
Dear readers, this blog will no longer be updated.  All contents will be moved to: upcycleliving.blogspot.com Please update your link, and we hope to see you again soon  😊 4 good reasons that made me think of making my own hand fan: Extremely hot weather Some used disposable chopsticks and manky wooden spoons lying around Some odd old table mats I can't be bothered to spend money on an ugly ones available in the shops And the whole process can't get any simpler: Cut out 2 identical rectangles from the table mat Spread strong glue evenly on the underside of each cut out mat, leave to dry. Stick the 2 chopsticks together with strong glue.  When the chopsticks are dry and firmly in place, apply thick glue over about 2-3 inches of the smaller end (depends on the length). Now place the glued part onto the middle of one of the cut out mat's underside, then press on the other cut out mat, making sure that all sides are in line. Leave to dry...

DIY Tinsel Christmas Tree

Image
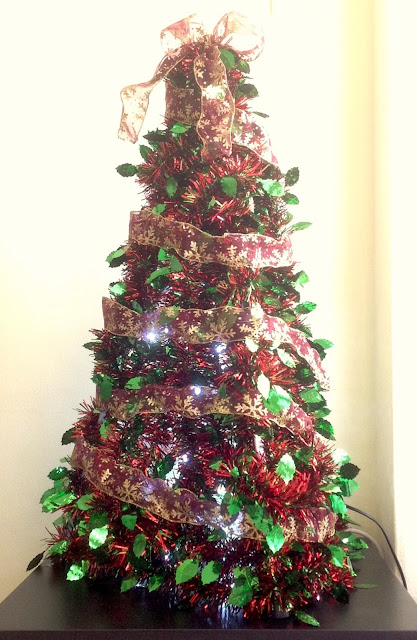
Dear readers, this blog will no longer be updated.  All contents will be moved to: upcycleliving.blogspot.com Please update your link, and we hope to see you again soon  😊 Angel lights are placed inside of the tree for a softer feel The bad news is, our tripod was broken (the top bit - heaven knows when and how that happened). The good news is, I can now use it for something else with no guilt (especially to all the photography enthusiasts out there) - as a base for our 2015 DIY Christmas tree! DIY Christmas tree from a broken tripod and some Christmas tinsel This has got to be the easiest-to-assemble Christmas tree to date. All I did was set the tripod up to the height I want, then tie the strips of Christmas tinsel around it. Everything can be packed away easily and reused for next Christmas. The wired ribbon has been used a few times on the 2012 Christmas tree on the wall , the 2010 CD Christmas tree , and our very first DIY Christmas tree in 2008 ...

Sprouted Onions, Save 'em!

Image
Dear readers, this blog will no longer be updated.  All contents will be moved to: upcycleliving.blogspot.com Please update your link, and we hope to see you again soon  😊 It's frustrating when you're too busy to cook and find that the onions started sprouting. Don't bin them just yet. Peel off the rotten bits if any, place each one in a glass and fill enough water to cover the roots; they will grow into some fresh, green spring onion and double up as a nice little decoration by the kitchen window. Just make sure to replace water with fresh one every other day, and they would be good for a week or so. Once the bulb starts rotting you should harvest all the spring onion and get rid of the rest. At least by then it would have served its best to you.

Angel Lights and Paper Lanterns

Image
Dear readers, this blog will no longer be updated.  All contents will be moved to: upcycleliving.blogspot.com Please update your link, and we hope to see you again soon  😊 The biggest issue we have with these paper lanterns was that they get burnt easily, so a non-fire related solution is essential. I saw some lanterns that use bulbs and thought that we can have our DIY ones: If the power sockets were designed in a more intelligent way, i.e. higher up on the wall and not all the way down close to the floor, we could have hung the lanterns horizontally, across the window. But since the angel lights cable isn't long enough and this is the furthest it can reach so it will have to do for now, until I get another light bulb above my head :) This is what's happening inside the lanterns: Every 7 or 8 bulbs are tied into a cluster using used twist tie wires (I saved them from all sorts: loaf of bread, electrical products, etc). Each cluster ...

DIY Hanging Kitchen Hand Towels

Image
Dear readers, this blog will no longer be updated.  All contents will be moved to: upcycleliving.blogspot.com Please update your link, and we hope to see you again soon  😊

Wine Bag from Old Ikea Blanket

Image
Dear readers, this blog will no longer be updated.  All contents will be moved to: upcycleliving.blogspot.com Please update your link, and we hope to see you again soon  😊         The old Ikea fleece blanket serves as an internal lining that will stop the glass bottles from knocking each other, while giving the bag a soft spongy feel. 1. Iron out both the fabric scraps 2. Trim the fabrics into equal size, leaving excess on the sides for the printed one. 3. Double-fold in the side of the printed material all around, securing by ironing. 4. Wrap over the trimmed old Ikea blanket, fold the excess sides around it. 5. This is how it should look now. 6. Fold the layered fabrics in half (printed one face out) and stitch the bag up, leaving the top as opening. When this is done, stitch the middle together to make 2 bottle pockets. Found an old bag strap and made it the straps.

What to do with Old T-shirts

Image
Dear readers, this blog will no longer be updated.  All contents will be moved to: upcycleliving.blogspot.com Please update your link, and we hope to see you again soon  😊 The last time we moved, a lot of our furniture got scratched because we didn't have enough shrink wrap for everything. So to still not spend too much on disposable material for this move, I used some of our old baggy t-shirts to wrap around smaller furniture: drawer units, cabinets, bedside tables, etc. After the move, they can then be cleaned again and proceed to their next stage: cleaning cloth :)

Reusing Wine Bottle Corks

Image
Dear readers, this blog will no longer be updated.  All contents will be moved to: upcycleliving.blogspot.com Please update your link, and we hope to see you again soon  😊 Then I thought of our collection of wine bottle corks: Simply twist and screw it onto the sticking out screw. The sharp pointy screws are now well wrapped up and no one would get hurt. Hoarding on the old corks did pay out eventually. The rest of our wine cork collection was made into  trivets  :)

Foam Fruit Wrappers Multiple Reuse

Image
Dear readers, this blog will no longer be updated.  All contents will be moved to: upcycleliving.blogspot.com Please update your link, and we hope to see you again soon  😊 Thanks to Aeon Supermarkets (previously known as Jusco) in Kuala Lumpur, we've learned to reuse those netty foam fruit wrappers as bottle protectors when we buy wine. It's really simple - just pull it over the wine bottle and that's it. It prevent any glass bottles from knocking on each other or on other hard/glass objects in the shopping bag. Very useful tip. And I'm really impressed with Aeon that they actually saved and reused thousands of those fruit wrappers that are otherwise disposed of, at the same time educating their customers. But we don't have to stop just there do we? I have kept quite a few of those wrappers from my shopping trips to Aeon, just to reuse them again and again. And today I've just figured out another possible function for these little darlings. ...

Gift Wrapping Signage

Image
Dear readers, this blog will no longer be updated.  All contents will be moved to: upcycleliving.blogspot.com Please update your link, and we hope to see you again soon  😊 A friend of mine is volunteering at The Heavenly Gift for Community at Heart , a non-profit organisation, to help raise funds for underprivileged children in Malaysia to grant their little Christmas wishes. The event is held at Tropicana City Mall which is in my area, so I went personally for a little donation and to see if there's anything I can help (keep them accompanied and look helpful as I'm really not a very good salesperson lol). They have a free gift wrapping service counter next to the donation table so I thought I could at least help doing some gift wrapping. Then we realised that people aren't really aware of the free service because there isn't any signage apart from one bunting standee. So I offered to make them some signboards. This one here is for the bo...

Christmas Tree from old Christmas Crackers

Image
Dear readers, this blog will no longer be updated.  All contents will be moved to: upcycleliving.blogspot.com Please update your link, and we hope to see you again soon  😊 It's that time of the year again - you're right - time to get busy preparing for Christmas! And what can be more fun than getting the tree up? As usual, the rules here is to have nothing (or very little) bought. Everything must be old, used, or recycled. We had a great success last year with our CD Christmas tree , and the CDs were then stored away for their future use in God-knows-what; maybe rebuild the same tree, who knows? But this year we're going to be away for the holiday so we'll just have something really simple and doesn't require much work. As I was going through my craft boxes, I found this stack of beautiful glossy cardboard that used to be the body of some Christmas crackers we used last year (yes I actually saved those bits). Was initially thinking of making some p...

Christmas Stockings from Old Oven Gloves

Image
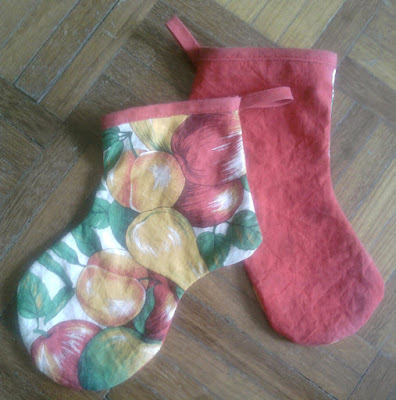
Bought a pair of oven gloves last year, which can't withstand a single wash - the inside was some sort of fluff that started coming off. So lesson learnt: must only get oven gloves that are fully fabric made. Anyways, being the hogger that I am, throwing away a rather new pair of (non-functioning) oven gloves still bothers me. So I've turned them into a pair of mini Christmas stockings, as they are red and green and look Christmasy. The magic wand I used here is a 1.5-inch needle and some magical red threads :-) Here are the oven gloves-turned-Christmas stockings: Here is what they looked like before: Being taken apart for cutting: Nothing's wasted!