Posts

Upcycled Wine Cork Trivet
Image
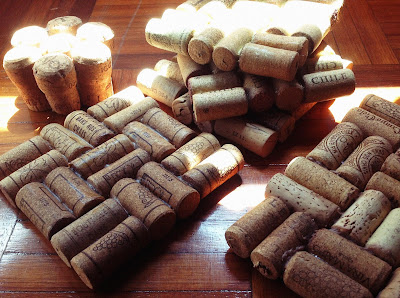
Dear readers, this blog will no longer be updated.  All contents will be moved to: upcycleliving.blogspot.com Please update your link, and we hope to see you again soon  😊 Until we started buying screw top wine, I had been painstakingly saving up all the wine corks: cleaning, drying and storing. Thanks to my inexplainable sentiment towards the little brown thing and the thought that one day I would be able to use them for something, I've filled up a whole large shoe box. And they had been in there for 7 long years! Just when I was about to give up and decide to clean them out, I caught a glimpse of a trivet made of wine corks in the background of a TV show. Obviously this is not an original idea and surely there must be others who've already done so, but hey I managed to use up all the corks and turned them into something useful - that's good enough for me. Most importantly: I get to keep them, not bin them ;)

What to do with damp stained shirt

Image
Dear readers, this blog will no longer be updated.  All contents will be moved to: upcycleliving.blogspot.com Please update your link, and we hope to see you again soon  😊 This cushion cover is made from one of my husband's old shirts, which unfortunately had been damp stained on the collar due to the highly humid weather. We can't give it away to the charity and the material is not suitable for cleaning. I was meant to upcycle it into a wrap dress but was too lazy to do so. Whilst I was staring into the buttons the idea just came to me. It was so simple: Just lay the shirt flat, buttoned, turned inside out. Mark out the square (whatever size fits your cushion) where the button panel will fall in the middle. Secure with pins or quick stitches, cut the excess material out and sew it all around. (I did it by hand as I don't have a sewing machine) Unbutton and turn inside out. Now you have a cushion cover with ready button fastening. We probably w...

Handmade Hand Fan

Image
Dear readers, this blog will no longer be updated.  All contents will be moved to: upcycleliving.blogspot.com Please update your link, and we hope to see you again soon  😊 4 good reasons that made me think of making my own hand fan: Extremely hot weather Some used disposable chopsticks and manky wooden spoons lying around Some odd old table mats I can't be bothered to spend money on an ugly ones available in the shops And the whole process can't get any simpler: Cut out 2 identical rectangles from the table mat Spread strong glue evenly on the underside of each cut out mat, leave to dry. Stick the 2 chopsticks together with strong glue.  When the chopsticks are dry and firmly in place, apply thick glue over about 2-3 inches of the smaller end (depends on the length). Now place the glued part onto the middle of one of the cut out mat's underside, then press on the other cut out mat, making sure that all sides are in line. Leave to dry...

DIY Tinsel Christmas Tree

Image
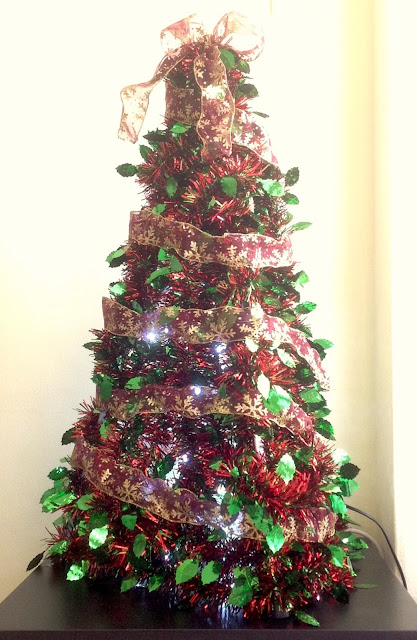
Dear readers, this blog will no longer be updated.  All contents will be moved to: upcycleliving.blogspot.com Please update your link, and we hope to see you again soon  😊 Angel lights are placed inside of the tree for a softer feel The bad news is, our tripod was broken (the top bit - heaven knows when and how that happened). The good news is, I can now use it for something else with no guilt (especially to all the photography enthusiasts out there) - as a base for our 2015 DIY Christmas tree! DIY Christmas tree from a broken tripod and some Christmas tinsel This has got to be the easiest-to-assemble Christmas tree to date. All I did was set the tripod up to the height I want, then tie the strips of Christmas tinsel around it. Everything can be packed away easily and reused for next Christmas. The wired ribbon has been used a few times on the 2012 Christmas tree on the wall , the 2010 CD Christmas tree , and our very first DIY Christmas tree in 2008 ...

DIY Flash Drive Organizer

Image
Dear readers, this blog will no longer be updated.  All contents will be moved to: upcycleliving.blogspot.com Please update your link, and we hope to see you again soon  😊 Due to work, I have to keep quite a few flash drives - each for a different type of job or client - in my bag. Although there are small compartments in my bag, I still find myself having to ransack through other stuff in the same pocket to get to the right flash drive. I've looked everywhere for a flash drive organizer but I just can't find one that I like; and most importantly, I do try not to make unnecessary new purchases. So I went to get some inspiration and help from my sewing box, and made this: I found some fabric scrap big enough for my flash drive organizer pattern, an old zip I saved from some old clothes, and an old and partly used Ikea fleece blanket (which I've used some for the snake stuffed toy ). Here are the few simple steps of the making of the flash drive organi...

Handmade Card Tag Holder

Image
Dear readers, this blog will no longer be updated.  All contents will be moved to: upcycleliving.blogspot.com Please update your link, and we hope to see you again soon  😊 I have to wear an access tag to work but I've never understood why the tag holders have to be designed the way they are. The lanyard that the office provides has a clip with sharp edges (red arrow), and my arms often get caught on it as I'm a naturally clumsy person. Also, the fabric based lanyard absorbs sweat and dirt so easily in this hot weather, it looks manky and disgusting. Not to mention that it is a plain ugly sight! I tried looking for a commercially made tag holder but they are expensive yet not very user-friendly; and they don't last. After a few scratches and losing some skin on my arms, I had to do something about it. I dug out some fabric scraps I've been keeping for a while, and picked this one - a family member brought some really nice materials back from a trip ...

DIY Ang Pow Packets

Image
Dear readers, this blog will no longer be updated.  All contents will be moved to: upcycleliving.blogspot.com Please update your link, and we hope to see you again soon  😊 Walking through the Lunar New Year decorations in the shopping mall yesterday, reminded me that we'll need to get hold of some Ang Pow packets (little red envelopes for new year money). We usually get them free with purchase from departmental stores and supermarkets, but you'll often end up with too many or too few of certain designs/sizes. I'm not entirely keen on making unnecessary purchases just for those red packets, let alone advertising for corporations who are already making money out of us. That's when these pretty backing papers springs to mind. I thought their fancy floral patterns and festive colours would definitely make great material for some DIY Ang Pow packets. After a few hours on a quiet Saturday mid morning (with a few TV programmes and cups of tea thrown in), I'v...