Posts

Stuffed Toy Snake from Ikea Fleece Blanket

Image
Dear readers, this blog will no longer be updated.  All contents will be moved to: upcycleliving.blogspot.com Please update your link, and we hope to see you again soon  😊 The process was really simple: mark two identical shapes of a snake on it with a 2B pencil, cut around them with 1-cm space allowance.  Stack the 2 shapes together, place a red ribbon of 4" length on where the mouth is (as the tongue) and stitch along the marked line, leaving about 4" of opening.  Fill it up with the old pillow stuffing, bit by bit. Then stitch up the opening.  As for the patterns on the snake, they were some lace trimming from my craft box. The eyes were buttons from my sister's dress (buttons that she hated and removed so I saved them). The red ribbon was saved from some old present we received. That was my mink boa for the evening, and good for sofa decoration for the year. Note: The remaining Ikea blanket has been made into a  wine bottl...

Foam Fruit Wrappers Multiple Reuse

Image
Dear readers, this blog will no longer be updated.  All contents will be moved to: upcycleliving.blogspot.com Please update your link, and we hope to see you again soon  😊 Thanks to Aeon Supermarkets (previously known as Jusco) in Kuala Lumpur, we've learned to reuse those netty foam fruit wrappers as bottle protectors when we buy wine. It's really simple - just pull it over the wine bottle and that's it. It prevent any glass bottles from knocking on each other or on other hard/glass objects in the shopping bag. Very useful tip. And I'm really impressed with Aeon that they actually saved and reused thousands of those fruit wrappers that are otherwise disposed of, at the same time educating their customers. But we don't have to stop just there do we? I have kept quite a few of those wrappers from my shopping trips to Aeon, just to reuse them again and again. And today I've just figured out another possible function for these little darlings. ...

Express Ribbon Christmas Tree On The Wall

Image
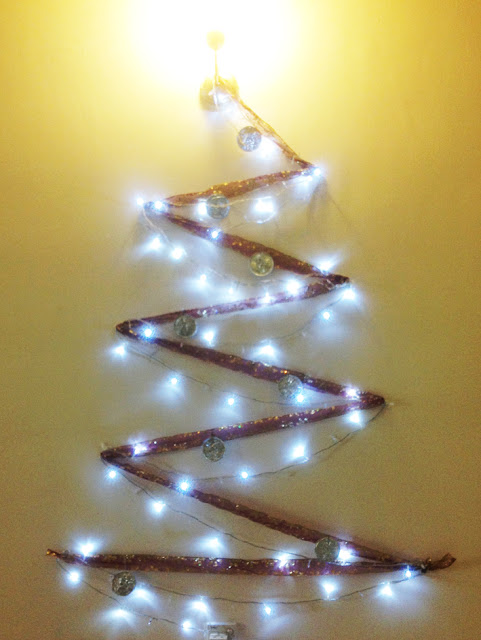
Dear readers, this blog will no longer be updated.  All contents will be moved to: upcycleliving.blogspot.com Please update your link, and we hope to see you again soon  😊 When I made the Mini Cardboard Tabletop Christmas Tree , I thought I was going to settle for just that. After all, we are packing up for the move; it's going to be a sad little Christmas. And as I was taking down all the 3M hooks here and there to leave the landlord a clean wall, these little 3M wonders gave me an idea. Well you see, I've bought stashed away quite a bit of the replacement 3M stickers for more than a year now; and they don't work well after hibernating in a shoebox, in a damp house in a humid country for that long. Now they will have the opportunity to shine (literally) before they announce retirement. So all together, 8 used and reused 3M wire hooks, 8 not-working-so-well 3M removable stickers, 1 good old reliable Christmas wired ribbon, angel lights from 2010 Christmas ...

Mini Cardboard Tabletop Christmas Tree

Image
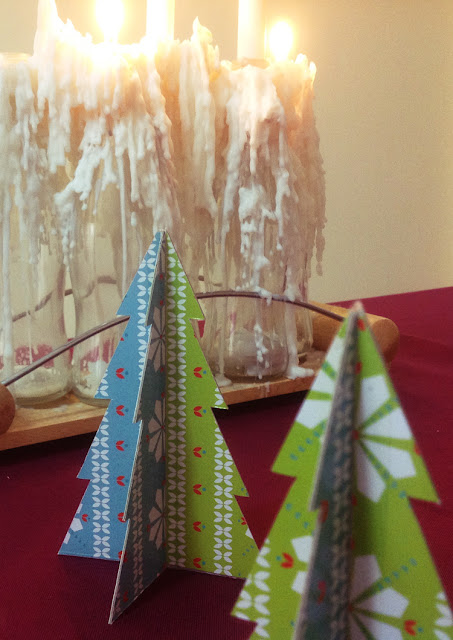
Dear readers, this blog will no longer be updated.  All contents will be moved to: upcycleliving.blogspot.com Please update your link, and we hope to see you again soon  😊 This Christmas is going to be a quiet one for us as we are in the midst of moving, so a big(ish) tree like previous years is just impractical. But not having a tree at all would make it even sadder. And the solution is: a tiny, mini, tabletop cardboard Christmas tree!    The making is pretty simple: View larger image in new tab or window 1. Material: some patterned or printed cardboard (old Christmas cards, Christmas merchandise packaging, etc), I cut these from last year's Christmas crackers packaging box. 2. Cut them into equal sizes: 2 per tree. 3. Take 2 and stick them together, back to back using double sided tape. 4. Make sure they are adhered nicely together, trim away any jutting out edges. 5. Cut each piece into 2 equal pieces. 6&7. Using a pen...

Gift Wrapping Signage

Image
Dear readers, this blog will no longer be updated.  All contents will be moved to: upcycleliving.blogspot.com Please update your link, and we hope to see you again soon  😊 A friend of mine is volunteering at The Heavenly Gift for Community at Heart , a non-profit organisation, to help raise funds for underprivileged children in Malaysia to grant their little Christmas wishes. The event is held at Tropicana City Mall which is in my area, so I went personally for a little donation and to see if there's anything I can help (keep them accompanied and look helpful as I'm really not a very good salesperson lol). They have a free gift wrapping service counter next to the donation table so I thought I could at least help doing some gift wrapping. Then we realised that people aren't really aware of the free service because there isn't any signage apart from one bunting standee. So I offered to make them some signboards. This one here is for the bo...

Eco Egg Crates Christams Tree

Image
Dear readers, this blog will no longer be updated.  All contents will be moved to: upcycleliving.blogspot.com Please update your link, and we hope to see you again soon  😊 Open in new tab or window to view larger image. Angel with smiley face drawn on cut out cardboard It is small - under 6', and made out of used egg crates held up by rustic wood! Hanging on the tree are little angels with wings made from fan-fold recycled paper (old magazine pages, used wrapping paper, etc) and halos made from twist tie wires (probably from bread packaging), and smiley faces drawn on cut out cardboard! It is not grand like most of the big shopping malls in Kuala Lumpur or Petaling Jaya, but it doesn't look pathetic like many either. And I think that the artists have put great effort in the thinking process and execution to keep consumption to the minimum and still came up with something this lovey. Whoever did this, well done!

Ripped Trousers, Rescued

Image
Dear readers, this blog will no longer be updated.  All contents will be moved to: upcycleliving.blogspot.com Please update your link, and we hope to see you again soon  😊 Here's one of those tasks that I get given by my husband from time to time: fix it! He loves these trousers so much that he wears them again as soon as they get cleaned. And look what happened? The cloth at the waist band is all ripped. There is such a big hole that can't just be sewn back with threads. Also, the print is a very specific camouflage pattern which means that I can't just take any excess cloth and patch it on. But since the back pockets are mainly for decoration purposes, the rescue is here! I took the left back pocket out stitch by stitch very carefully so that I don't leave yet another hole behind. After a little ironing to get rid of the creases, I now have enough material to patch the waist band back. (It's like how they take a bit of the buttock ski...