Express Ribbon Christmas Tree On The Wall

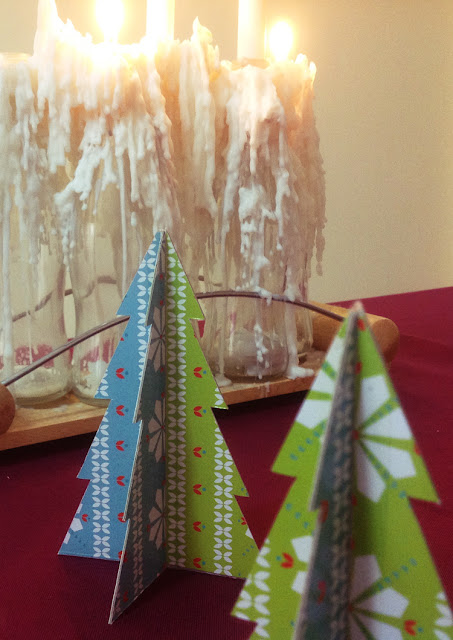
Dear readers, this blog will no longer be updated. All contents will be moved to: upcycleliving.blogspot.com Please update your link, and we hope to see you again soon 😊 When I made the Mini Cardboard Tabletop Christmas Tree , I thought I was going to settle for just that. After all, we are packing up for the move; it's going to be a sad little Christmas. And as I was taking down all the 3M hooks here and there to leave the landlord a clean wall, these little 3M wonders gave me an idea. Well you see, I've bought stashed away quite a bit of the replacement 3M stickers for more than a year now; and they don't work well after hibernating in a shoebox, in a damp house in a humid country for that long. Now they will have the opportunity to shine (literally) before they announce retirement. So all together, 8 used and reused 3M wire hooks, 8 not-working-so-well 3M removable stickers, 1 good old reliable Christmas wired ribbon, angel lights from 2010 Christmas